Is project cost management out of control?
With NetSuite 2021 Release 2 we have seen NetSuite focus on enhancements that optimise efficiencies and increase automations, allowing businesses like yours to streamline your operations even further.
A new addition to the SuiteApp Marketplace is Purchase to Project, a new feature that allows users, especially project managers, to create purchase transactions that are related to projects and project tasks. Expenses related to projects can then easily be tracked and controlled.
Having visibility over expenses and purchases related to projects and linked project tasks is important for any project manager to provide control. This allows the project manager to act – stay within budget, shift costs to other budget categories, as applicable, and reduce the risk of overspending.
The Purchase to Project solution is a native NetSuite SuiteApp which is managed and publicly available. During updates the SuiteApp will automatically be updated to the latest version and new features will be added.

For the SuiteApp to be installed there are a few add-on modules and features required.
Add-On modules:
![]() Project Accounting and Management
Project Accounting and Management
![]() Job Costing
Job Costing
Features:
![]() Projects
Projects
![]() Project Management
Project Management
![]() Job Costing and Project Budgeting
Job Costing and Project Budgeting
![]() Accounting
Accounting
![]() A/R
A/R
![]() Client SuiteScript
Client SuiteScript
![]() Server SuiteScript
Server SuiteScript
![]() SOAP Web Services
SOAP Web Services
![]() SuiteCloud Development Framework
SuiteCloud Development Framework
Installation of the Purchase to Project SuiteApp is easily done from the SuiteApps Marketplace by searching for Purchase to Project and clicking install.
Now that the technicalities are sorted, we will get into the use of the solution.
What to do:
Step 1: Allow purchase orders and/or vendor bills on projects
Step 2: Tag vendors as project vendors
Step 3: Create purchase order/vendor bill or associate existing purchase order/vendor bill with project
Step 4: View purchase orders/vendor bills on project or project task
Step 1: Allow purchase orders and/or vendor bills on projects
Firstly, the need would have to be identified on which projects the expenses and purchases needs to be tracked on. Setting up a project to allow purchase orders or vendor bills also allows the same to be tracked on the associated project tasks.
To allow a project and project tasks to associate purchase orders and/or vendor bills:
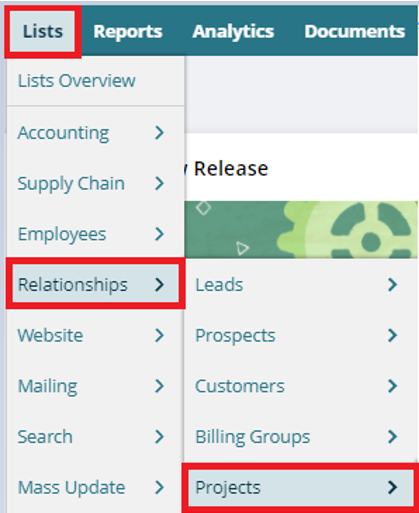
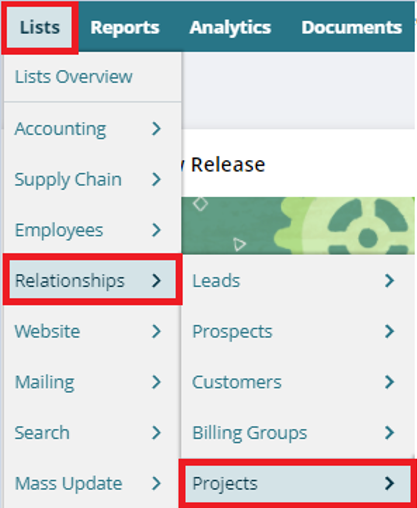
1. Navigate to: Lists > Relationships > Projects.
2. On the project list, click “edit” next to the applicable project.
3. Click on the “Preferences” subtab and check “Allow Purchase Orders” and/or “Allow Vendor Bills” as applicable.
After completing the above instructions, each project with its associated project tasks that have the checkbox(es) set will be able to have Purchase Orders and Vendor Bills associated with them. Note the “Create Purchase Order” button that becomes available under the “Procurement” subtab upon activation of the Purchase Order allowance.
Step 2: Tag vendors as project vendors
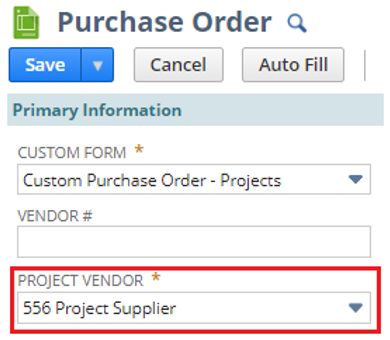
Secondly, the vendors who have been approved and identified to deliver goods and services for projects and projects tasks needs to be tagged as project vendors. This step allows the vendor to be selected in the “Project Vendor” field on the “Custom Purchase Order – Projects” form. Serves as a way to know only identified project vendors are selectable for projects and projects tasks, preventing a user from accidentally selecting incorrect vendors.
To tag the vendor as a project vendor:
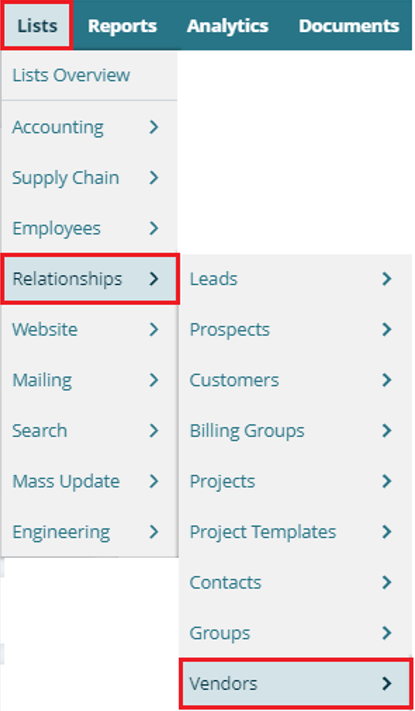
1. Navigate to: Lists > Relationships > Vendors.
2. On the vendor list, click “edit” next to the applicable vendor.
3. Check the “Project Vendor” field on the main screen. (Note this field can be moved to where required)
4. Click “Save”
Step 3: Create purchase order/vendor bill or associate existing purchase order/vendor bill with project or project task
In this step we are going to associate an existing purchase order / vendor bill with a project. This will allow the associated purchase order and vendor bill to be viewable on the project under the “Procurement” subtab.
Open the applicable purchase order / vendor bill in edit mode:
1. Search for Purchase Order / Vendor Bill in the Global Search bar that needs to be associated with a project and click edit to open this Purchase Order / Vendor Bill.
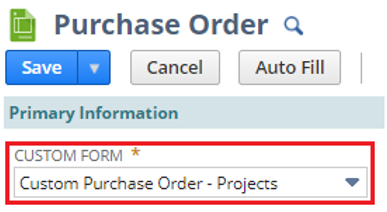
2. Change the form to the ” Custom Purchase Order – Projects” form.
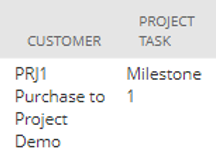
3. On the items and expenses entered on the purchase order or vendor bill, enter the project in the “Customer” column to associate the item/expense with. Or if the item/expense needs to be associated with a project task, also enter the project task name in the “Project Task” column.
4. Click “Save”.
To create a new purchase order associated with a project or project task:
1. On the applicable project or project task in view mode, navigate to the “Procurement” subtab.
2. Click the “Purchase Orders” page and then click the “Create Purchase Order” button. (A new tab will open allowing the user to create a new purchase order)
3. Change the form to the “Custom Purchase Order – Projects” form.
4. Select the Project Vendor from the list of vendors setup as project vendors from Step 2.
5. Complete the items/expenses and other required fields on the purchase order. Note that the project and project task if applicable will automatically be entered on the lines, once the expense or item is entered.
4. Click “Save” once done.
Additional information: More than one project or project task can be associated with the same purchase order, since the project / project task is selected on the line. For example if a single vendor is used to provide a service on two different projects and only one purchase order was created, then on line 1 Project A can be selected and on line 2 Project B. Only the relevant amount per line will be displayed on the associated project.
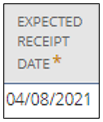
On the purchase order lines the “Expected Receipt Date” column can also be populated which will compare against the project / project task start and end dates that the line was associated with.
Step 4: View purchase orders/vendor bills on project or project task
In the final step we will look at the way we can view the associated purchase orders and vendor bills on the relevant project.
